
The Great Smoky Mountains National Park is a veritable treasure trove of photographic opportunities, boasting a jaw-dropping array of landscapes, wildlife, and ethereal atmospheric conditions. Whether you’re a seasoned photographer with a keen eye for composition or a beginner looking to improve your portfolio, this comprehensive guide will take you on a virtual tour of the Smokies, armed with pro tips to capture its beauty in pixels and film. Get ready to traverse from sunlit valleys to mist-laden mountaintops, capturing the essence of one of America’s most visited national parks.
Must-Visit Photography Locations
Clingmans Dome
Standing tall at 6,643 feet, Clingmans Dome is not just the highest point in the Great Smoky Mountains National Park, but it also presents some of the most extraordinary photographic opportunities. This iconic location is a must-visit for any photographer—amateur or pro—eager to capture the Smokies’ sublime grandeur.
Perfect Timing for Ethereal Shots
When it comes to photography, timing is everything, and Clingmans Dome is no exception. For sunrise shots, aim to reach the summit during the “blue hour,” that magical period just before the sun breaches the horizon. The sky adopts a rich, deep blue, contrasting vividly against the emerging sunlight. Sunsets are equally breathtaking, with the sky painted in hues of orange, pink, and purple as the sun dips behind the mountains.
Insider Tip: Given its popularity, Clingmans Dome can become crowded quickly, especially during the golden hours of sunrise and sunset. To ensure you get that perfect, crowd-free shot, aim to arrive at least an hour before your intended shoot time.
Composition and Framing
The observation tower’s 360-degree view offers endless possibilities for framing your shots. Use the rule of thirds to position the horizon along the lower or upper third of your frame, accentuating either the sky or the landscape. Alternatively, employ leading lines like the spiral ramp itself or the meandering mountain ridges to guide the viewer’s eye into the frame.
Equipment Needed: A wide-angle lens is indispensable for capturing the vast expanses of sky and landscape. Consider a lens with a focal length between 14mm and 24mm for full-frame cameras, or 10mm to 18mm for crop-sensor cameras. A tripod is also essential, not just for stability in low light conditions, but also for precision framing and long-exposure shots.
Optimal Settings and Techniques
Given the low light conditions of dawn and dusk, you’ll likely be dealing with slower shutter speeds. This makes a tripod crucial for eliminating camera shake. Utilize a low ISO setting (between 100-400) to minimize noise, and experiment with a small aperture (f/8 to f/16) to keep both the foreground and background in focus. For capturing movement—like rolling clouds or birds in flight—try a slightly faster shutter speed, or use a neutral density filter for smoother long-exposure shots.
By paying attention to timing, composition, and equipment, Clingmans Dome can offer you some of the most spiritually uplifting and technically satisfying photography experiences in the Great Smoky Mountains.
Looking for somewhere to stay? Check you my post: The Best Campsites in the Great Smoky Mountains: A Comprehensive Review
Cades Cove
Nestled within the Great Smoky Mountains National Park, Cades Cove is a sprawling valley that encapsulates the timeless beauty of the Appalachians. With its expansive meadows, historic structures, and abundant wildlife, this location is a treasure trove for photographers who crave a mix of landscape, architecture, and wildlife photography.
The Golden Hours: When Nature Awakens
If you’re eager to capture the surreal beauty of fog-laden fields or the morning activities of white-tailed deer, timing your visit during the early morning golden hour is crucial. As the sun’s first rays break through the mist, you’ll encounter landscapes that seem like they’re straight out of a painting.
Insider Tip: An early morning visit not only gives you magical lighting conditions but also offers the best opportunities to capture active wildlife. This is when animals like deer and even the elusive black bear are most likely to be foraging.
Scene Composition: Balancing Elements
Cades Cove presents the photographer with a plethora of compositional choices. One could frame a historic log cabin against a backdrop of lush, rolling hills. Alternatively, use a shallow depth of field to focus on the intricate details of blooming wildflowers with the misty mountains softly blurred in the background.
Equipment Needed: Given the Cove’s diverse photographic subjects, a telephoto lens (200mm and above for full-frame cameras or 135mm for crop-sensor cameras) is essential for capturing wildlife from a safe distance. A macro lens in the 90-105mm range will allow you to reveal the delicate details of the local flora, turning each petal and leaf into a work of art.
Camera Settings and Techniques
When shooting wildlife, a faster shutter speed is generally preferable to freeze motion. Settings around 1/500s to 1/1000s should suffice, depending on the animal’s speed. If you’re shooting in low light conditions or capturing the landscape’s nuanced hues, consider using a circular polarizer to reduce glare and make the sky pop. For landscape shots, an aperture setting between f/8 and f/11 usually provides a good depth of field, ensuring that both your subject and the backdrop are in focus.
Combining Elements for a Cohesive Story
Cades Cove offers more than just isolated subjects to capture; it offers a narrative. A series of photos could range from wide-angle landscape shots of the sun rising over misty meadows to close-ups of dewdrops clinging to leaves, and action shots of deer bounding through the field. By varying your approach and subjects, you can tell a complete story of your Cades Cove experience, capturing the essence of this Appalachian wonderland in your portfolio.
By meticulously planning your timing, understanding your compositional elements, and using the right equipment, Cades Cove can yield an extraordinary collection of images that resonate with both the beauty and spirit of the Appalachian landscape.
Roaring Fork Motor Nature Trail
Situated in the heart of the Smokies, the Roaring Fork Motor Nature Trail is a haven for anyone looking to photograph the pure magic of water in motion. This scenic loop, which spans approximately 5.5 miles, offers an assortment of vantage points to capture waterfalls in all their glory, as well as the vibrant greenery that surrounds them.
Timing Is Everything: When to Click the Shutter
Waterfalls are at their photographic best when water levels are high. The rush of water creates that silky, ethereal effect that photographers covet. However, that perfect shot requires more than just a hefty flow; you’ll also want minimal interference from crowds for uninterrupted compositions.
Insider Tip: Your ideal window for photography here is right after a rainstorm. The water levels are peaking, and fewer people venture out, allowing you a clear shot and the freedom to set up your equipment without hassle.
Composition: Framing Nature’s Theater
While the waterfalls are undeniably the stars of this loop, don’t overlook the lush foliage that acts as a natural frame for your shots. The interplay of water with leaves and rocks adds a dynamic element to your compositions, making the photographs visually rich and intriguing.
Equipment Needed: A neutral density (ND) filter is your best friend when it comes to long-exposure shots. This will allow you to slow down your shutter speed without overexposing the shot, giving the waterfall that dreamy, flowing look. For the environment around the waterfalls, a wide-angle lens (16-35mm for full-frame cameras or 10-22mm for crop sensors) is indispensable. This allows you to capture the grandeur of the setting while still maintaining the waterfall as your focal point.
Settings and Techniques for That Perfect Shot
If you’re using an ND filter for long exposure, you’ll likely want to set your camera to a smaller aperture (around f/11 to f/16) to ensure a wide depth of field. Shutter speeds can vary depending on how ‘silky’ you want the water to appear; anything from 0.5s to 5s is a good starting point for experimentation. To avoid any shake, especially during these long exposures, a tripod is an absolute must.
The Roaring Fork Motor Nature Trail offers a blend of elemental forces and tranquil scenery, making it a go-to location for capturing the poetic interplay of water, rock, and plant life. With the right timing, equipment, and techniques, you can immortalize the awe-inspiring beauty of this natural wonder.
Specific Photography Tours and Workshops
Smoky Mountain Photo Workshops
Run by local photography experts, these workshops focus on hands-on fieldwork and post-processing tutorials.
Insider Tip: Workshops during autumn are particularly fruitful for capturing fall foliage.
Joseph Rossbach Guided Workshops/Tours
Specializing in nature and landscape photography, Rossbach’s tours promise close encounters with the Smokies’ flora.
Actionable Tips for Specific Shots
While the Smokies offer an awe-inspiring canvas for photographers of all levels, mastering the techniques to capture its multifaceted beauty requires some advanced planning and understanding of photography fundamentals. Let’s dive into actionable tips for specific types of photography you’ll most likely engage in during your trip to the Smokies.
Landscape Photography: Crafting Visual Stories
Use Leading Lines for Dynamic Composition
Natural formations in the Smokies such as rivers, pathways, or even rows of trees can serve as powerful leading lines in your frame. These lines can guide the viewer’s eye towards a focal point, such as a majestic mountain peak or a stunning sunset. Experiment with different angles to maximize the impact of these leading lines.
Insider Tip: The trails leading to Clingmans Dome offer an excellent opportunity for utilizing leading lines, drawing viewers into the grandeur of the mountain vistas.
Equipment Needed: A wide-angle lens (16-35mm for full-frame or 10-22mm for crop sensors) is often ideal for these types of shots, allowing you to include more of the foreground and sky.
Golden Hour Glory: Master the Light
The golden hour—the period shortly after sunrise or before sunset—offers a soft, directional light that can add incredible depth and texture to your landscape shots. In the Smokies, this is the time when the mountains truly seem to come alive with color.
Insider Tip: The Oconaluftee Overlook is a fantastic spot for golden hour shooting, offering a panoramic view of the sun rising or setting over the mountain range.
Equipment Needed: A graduated neutral density filter can help balance the exposure between the sky and the landscape during these times of dramatic lighting.
Wildlife Photography: The Waiting Game and Safety
Be Patient and Alert
Early mornings and late afternoons are typically the best times for wildlife activity. Whether it’s the white-tailed deer in Cades Cove or black bears in Roaring Fork, patience is key.
Insider Tip: Choose spots where you can safely and unobtrusively set up your equipment without disturbing the wildlife or blocking trails.
Equipment Needed: A telephoto lens (300mm or higher) is essential for capturing detailed close-ups while maintaining a safe distance.
Safety First: Ethical and Safe Practices
It’s tempting to get as close as possible to wildlife for that perfect shot, but safety—for both you and the animals—must come first. Abide by all park guidelines concerning wildlife interactions.
Equipment Needed: Along with your telephoto lens, consider a monopod for added stability without the bulk of a tripod, especially when you need to change your position quickly.
Atmospheric Shots: Capturing the Smokies’ Mystique
Capture the Mist for Dreamy Compositions
The Smokies are named for the natural mist that often hangs over the mountains and valleys. To capture this ethereal atmosphere, use a wide aperture (f/1.8 to f/4) to create a shallow depth of field, making the mist appear even dreamier.
Insider Tip: Locations near water bodies, like the area around Abrams Falls, often produce the most dramatic mist.
Equipment Needed: A fast prime lens with a wide aperture is crucial for these shots to allow for the most light and achieve the desired depth of field.
By adopting these actionable techniques tailored to specific shooting conditions in the Smokies, you can ensure that your portfolio will do justice to the stunning, multifaceted beauty of this iconic American landscape. Gear Stores
Lesser-Known Spots for Unique Photography
Sometimes the best shots come from less-visited locations that offer a sense of tranquility and exclusivity. If you’re in search of lesser-known photography spots in the Smokies, consider these two gems:
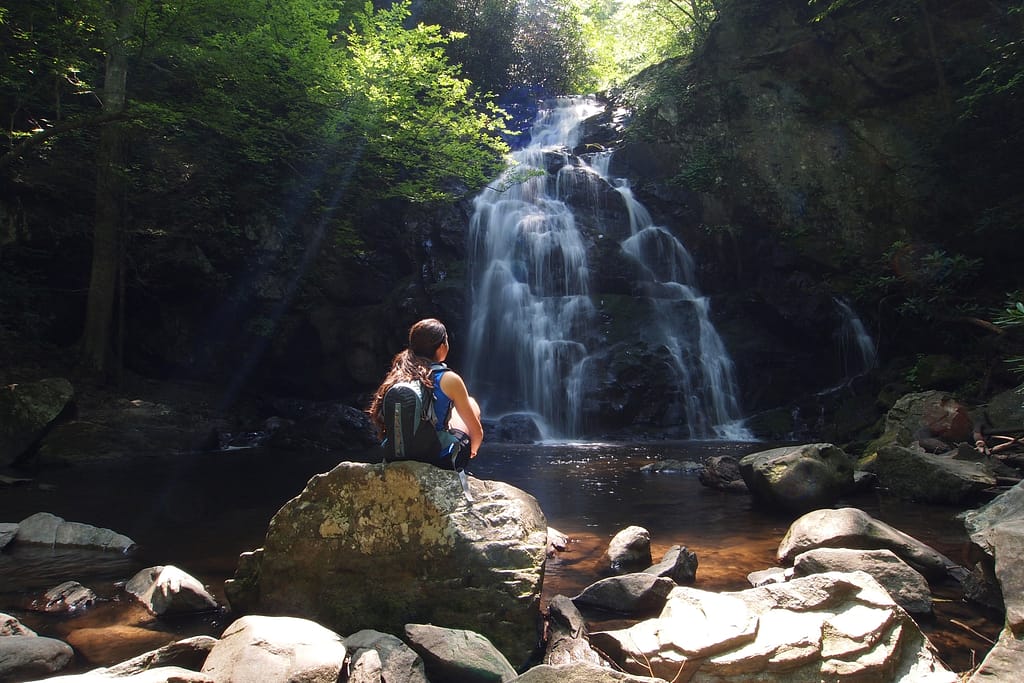
Midnight Hole Falls
Located within the Big Creek area, Midnight Hole Falls is a lesser-known yet captivating destination. The falls culminate in a deep, emerald pool that is perfect for long-exposure shots, lending a mystical aura to your photos.
Insider Tip: Visit during weekdays for fewer crowds and take advantage of the natural framing provided by surrounding rocks and trees.
Equipment Needed: Bring a neutral density filter for long-exposure shots and a wide-angle lens to capture the falls and pool together. A tripod is also essential for stabilization during long-exposure shots.
Mouse Creek Falls
Mouse Creek Falls is another tucked-away treasure ideal for intimate nature shots. This spot is perfect for capturing cascading water against a backdrop of dense foliage, giving your photos a serene, isolated feel.
Insider Tip: Early mornings are the best time for soft, natural lighting and also to avoid occasional hikers.
Equipment Needed: A telephoto lens works well here for isolating details like water droplets on leaves or distant rock formations. Also, consider a macro lens for capturing intricate patterns on leaves or tree bark.
These lesser-known spots offer unique settings to create compelling compositions, making your Smokies portfolio truly stand out.
By now, you should have a comprehensive roadmap to photographing the Smokies in all its glory. So why wait? Charge those camera batteries, clear your memory cards, and set off to capture the natural grandeur of the Great Smoky Mountains. And don’t forget to support local businesses on your trip; perhaps even frame your best shot as a keepsake!